Archive for February, 2010

Cornbread

Inspired by a recipe from The Gluten-Free Vegan by Susan O’Brien.
Taste tested and certified by people who can eat any kind of cornbread they want.
Certified as ‘very good’ by two people who usually do not like cornbread!

   Our Georgetown, Texas organization known as The Caring Place (TCP) provides a wide variety of services for people. They have a yearly Soup Supper fund raiser. Local restaurants donate hearty soups while TCP volunteers bake cornbread and desserts. I volunteered cornbread; not that I have ever been a big fan of any kind of bread for the obvious glutenful reasons. Gluten-free cornbread was my objective and for this I needed help. I had to enlist taste testers who know how traditional cornbread is supposed to taste.
   My first attempt seemed dry and even gritty. My friend Ann verified this for me. I was working with gluten-free, stone ground cornmeal which is fairly coarse. For the next attempt I decided to go all out and try also to target those who have dairy and egg allergies which meant searching for a vegan recipe. The one I chose specified ‘egg replacer’ and neither that term nor product has ever appealed to me.
   Flax seed and chia seed both form a gelatinous, viscous mass reminiscent of egg white when soaked in liquid. Some recipes are beginning to call for these seeds as the binder to use in place of egg. And both of these seeds contribute substantial nutritional benefits – my idea of what you should use in your food. As best I can tell right now flax seed requires three times as much by measure to bind like chia. Earlier recipes just called for the ground seed mixed with the dry ingredients. But experience is proving that preparing the seed separately in advance gives much better results.
   For the non-dairy ‘milk’ I prefer a mixture of my favorite almond milk mixed half & half with regular canned coconut milk. These combine to enhance the slight sweetness of cornbread and provide extra moisture that contributes greatly to the unique taste and texture.

Chia Goop (binder):
1 teaspoon ground chia seed
3 tablespoons water
Mix together in a medium microwave bowl.
Heat the mixture for about 30-40 seconds (just until it boils).
Set aside for at least an hour; longer is better.
It should be viscous like egg white.

Dry Ingredients:
1/2 cup brown rice flour
1/2 cup sorghum flour
4 teaspoons GF baking powder
1/2 teaspoon sea salt
1 cup GF cornmeal

Liquid Ingredients:
1 cup non-dairy milk (1/2 cup almond + 1/2 cup coconut)
1/4 cup agave nectar (low-glycemic; provides extra moisture)
1/4 cup vegetable oil

Preheat the oven to 425*F. Oil a non-stick 8” square pan with the same vegetable oil used for the batter and set aside.

In a large mixing bowl, combine all the dry ingredients and blend with a whisk. Add the other wet ingredients to the chia preparation and whisk those together. Dump all of the wet ingredients into the dry ingredients and mix well. Pour immediately into the prepared pan.

Place in the oven and bake for 18 to 20 minutes or until the edges start to brown. Test with a cake tester or toothpick to be sure. If you’ve done this before you can use the ‘touch test’. Cool briefly on a rack before cutting.

   I plan to pre-cut and wrap each serving piece separately to prevent cross-contamination with the regular cornbread. A package of Bob’s Red Mill gluten-free cornbread mix will also be prepared. Gluten-free is very much in the news lately and this will be interesting to observe just how much demand there is for the gluten-free versions as opposed to traditional cornbread!

Mom

Comments (4)

Apple Sweet Potato Crumble – on a snowy day in Texas

Snowballs Are Falling!

Snowballs Are Falling!

   Watching the snow, staying indoors all day and going back and forth between the kitchen and knitting on the afghan project to keep warm. Breakfast this morning was from a batch of this wonderful crumble that Ricki posted on Diet, Dessert and Dogs recently. My first batch used Granny Smith apples and although it was good the second batch was tastier using a sweeter variety of apples. We have no coriander and I just left it out but in the second batch I substituted ground cloves – that paired nicely with the sweet potato and other spices. And since I am currently avoiding oats I filled in with some other gluten-free carbs. The resulting crumble was more volume than expected so since my choices were pre-ground maybe a little less of those carbs next time. Also I needed to use up some pecans so that went in for the walnuts.
   Occasionally I envy Ricki having a husband and those adorable dogs willing to share her experiments. But with this apple-sweet-potato-crumble I am happy to have it all to myself! It freezes well so nine servings can last as long as two weeks.

Crumble Just Out of the Oven

Crumble Just Out of the Oven

Ingredients:
1/3 cup melted coconut oil
2 tablespoon agave syrup
20 drops liquid stevia
1 tablespoon finely ground flax seeds
1/3 cup plain unsweetened almond milk
3/4 cup walnut/pecan pieces
1/2 cup natural almonds (with skin)
1/2 cup uncooked quinoa flakes cereal
1/2 cup gluten free corn flake crumbs
1/3 cup coconut flour
1 tablespoon cinnamon
1 teaspoon ground ginger
1/2 teaspoon ground cloves
1/8 teaspoon sea salt
2 cups sweet potato purée
3 medium sweet apples, peeled, cored and coarsely grated
1 tablespoon finely ground chia seed
2 tablespoon apple juice
1 teaspoon pure vanilla extract
20-30 drops liquid stevia

Preheat oven to 350*F. Line a 9″ square pan with parchment, or coat with oil.

In the bottom of a large bowl, whisk together the melted coconut oil, agave syrup, liquid stevia, flax seed, and almond milk; set aside.

In the blender, process together (use a food processor if you have one) the nuts, cereals and coconut flour until the nuts are ground and mixture resembles a coarse meal. Add the cinnamon, ginger, cloves and salt and blend just to mix. Add the dry ingredients to the wet mixture in the bowl and toss with a fork (as if making pie dough) until it comes together in a very moist yet crumbly dough (it will stick together if pressed, but should readily separate into crumbles if tossed with the fork). Set aside while you prepare the filling.

To make the filling, mix together the pureed sweet potato, grated apple, apple juice, vanilla and liquid stevia.

Take about half the crumble mixture (you can just estimate) and press it firmly into the bottom of the pan. Top with the filling, spreading evenly. Sprinkle the remaining crumble mixture evenly over the filling and press gently with the palms of your hands.

Bake in preheated oven until edges are browned and the top of the crumble begins to brown a bit. This took about 30 minutes in my oven. Allow it to cool to room temperature before cutting into squares; reheat if desired to serve. Makes 9 large servings. May be frozen.

   After this morning I still have six pieces in the freezer and I will, I REALLY will, save-them-for-future-breakfasts, REALLY! This is hard . . . . because I want some NOW.

   Mid-morning I heated up one of my own Lentil Patties, also from the freezer. So if I am eating goodies from the freezer then why am I in the kitchen? Baking not only makes the house smell good, it helps keep the house warm and also makes enough goodies to share. I baked an old-favorite, glutenful batch of pumpkin bread to give away and share with neighbors. Then I blended the dry ingredients for Double Coconut Muffins. And I did the same with a new recipe for cornbread from The Gluten-Free Vegan recipe book .
   The Sit ‘n Stitch ladies are coming over Thursday morning and they kindly taste test my gluten-free recipes – they are generous and helpful with their critiques and I greatly appreciate their opinions.
   There are only a few more rows to knit on this afghan that has been under construction for maybe 18 months. We refer to these projects as Unfinished Objects or UFO’s.

Unfinished Object (UFO) - Soon To Be a Finished Object (FO)

Unfinished Object (UFO) - Soon To Be a Finished Object (FO)

After Friday my calendar clears somewhat and I can begin new experiments!

Mom

Comments (1)

The Bread Farm – a ridiculous true story

   Yesterday was one of those days when a long-ago, best-forgotten memory was triggered. And it was also a significant anniversary date of that memory.
   The trigger was a comment posted here by Sharon at Art of Gluten-Free Sourdough Baking. The anniversary was the day I went into labor with my first child – that would be Rita. The memory was the kitchen disaster I perpetrated that my own Mom cleaned up the next day describing it as ‘The Bread Farm’.
   My paternal Grandmother, she of the chickens, home grown vegetables and homemade soap, also baked her own sourdough bread. I was allowed to ‘help’ and usually had a small portion of dough allotted to me for my own creations. Grandma was always patient and she narrated each and every step of the process for my benefit.
   At home I learned to bake from recipes. I used store bought yeast just as we also used store bought eggs and store bought soap never realizing the essential differences.
   So that fateful evening Rita’s Dad and I were at home in our tiny apartment. I was restless and decided there was time to make up a batch of bread before bedtime. I mixed it up, kneaded it, and set it for the first rising on top of the stove where the pilot light would keep it warm. The utensils went into the sink for cleanup when the bread went into the oven. By then my feet hurt and my back was really aching. I stretched out in the recliner in the living room to read but mostly dozed. And I completely forgot the bread and went to bed
   In the morning the stove was covered with dough and was running down the front and one side. Across the top it had turned into a tenacious brick-like substance. After Rita’s Dad left for work I started the clean up.
   Mourning the loss of that perfectly good batch of bread I had the bright idea of salvaging it by using the remainder to start another batch. Grandma always put some of dough in a jar with additional flour and water and put it in the refrigerator until her next batch. So I carefully made up my ‘starter’ in a mason jar, screwed on the lid, and set it in the middle of the breakfast table. In the meantime I was having terrible stomach pains but that had been the story of my life (thanks to no gluten awareness at the time). I just rested across the bed between bouts of pain and in between times chiseled away at the stove. I never finished – hubby came home from work and called the doctor. We headed for the hospital.
   The next day my parents arrived, Rita and I were bonding, the stove was still doughy, the sink was full of utensils buried in an ever expanding yeast glob, the lid on the mason jar had come undone, and dough was spreading across the breakfast table.
   That was what happened the last time I attempted ‘sourdough’. While sourdough sounds like a good idea . . . . . .

Happy Birthday today, Rita!
Mom

Comments (1)

Deb El Just Whites

   ‘Mad as a wet hen’ . . . if you have ever seen the expression on a wet hen after her nest of hidden eggs has been discovered and taken away from her then you forevermore treat each and every egg with respect. My paternal grandmother raised chickens and while she took very good care of them she did not allow them to hatch baby chicks during the hot Texas summer. If a hen went missing and egg production was down the search was on. When the nest was found and the eggs confiscated the hen was soaked in a bucket of water to ‘cool her off’. A cold wet hen cannot incubate eggs. Scientists may claim that animals have no ‘facial expressions’ but any person, who has observed a cat, dog, hen, or any animal will beg to differ. That steely-eyed, obviously ticked-off hen made a lasting impression.
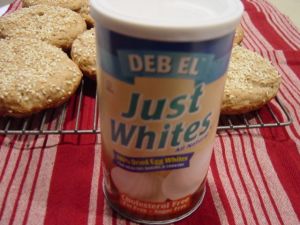
   If a recipe calls for only the white of an egg and I have no use for the egg yolk then I reach in the pantry for my container of Deb El Just Whites dried egg whites. These are made from the eggs that are too small to sell fresh at the grocery store. They are dried, pasteurized, and are negative for salmonella bacteria.
   One technique is to simply add the powder to the dry ingredients in the recipe and add the required amount of water in with the other liquid ingredients. My approach is to dissolve the egg white powder in the water until it has the consistency associated with fresh egg white and proceed from there. I simply prefer the results having tried both techniques.

Deb El Just Whites

Deb El Just Whites

   Deb El needs no refrigeration and stores on a pantry shelf until you need it. If you are low on fresh eggs and have no time to run to the store the prepared amount for two whites will substitute nicely for a whole egg. You can usually find Deb El on a shelf in the baking isle at your local grocery store.
   I am still enjoying the results of my recent batch of Hamburger Buns that made use of Deb El reconstituted egg whites in the amount required for the three egg whites in the recipe.

Mom

Leave a Comment

Hamburger Buns!

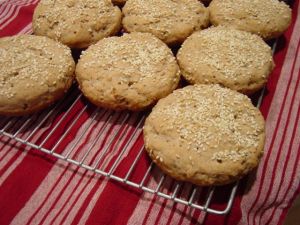
   These wonderful buns were adapted from the recipe for Gluten Free Whole Grain Hamburger Buns at WHEATLESS & MEATLESS. I used tapioca flour instead of cornstarch and agave nectar instead of sugar (yeast likes pretty much anything that has calories to feed it). When I use egg whites and have no use for extra yolks then I pull out the dry egg white powder and reconstitute it. This is a great basic recipe however you tweak it!

   If you do not have access to great commercial gluten-free baked goods it is worth your time to have a few basic bread recipes in your file so you can stockpile your own goodies. Having some really yummy basic breads stashed in the freezer can bring a smile to your face when you need a mood lift.
   The first pass at making these buns was very rewarding as far as technique and the wholesomeness of the ingredients. Plus I inherited two muffin-top pans (remember those?) from my friend Lynn and put them to good use with these buns.
   Don cooked burgers, potato salad, and deviled eggs for dinner. Having a bun for my burger for the first time in years meant that I cut my potato portion way back but that’s OK. Bun, burger, mayo, and lettuce – that is a luxury item for us gluten-free people! The next day at lunch one of the leftover deviled eggs cut up and sandwiched in a bun was my first egg-salad sandwich in probably twenty years.
   Make these ahead of when you need them and when you also have the time to be patient with the yeast. Yeast can be cranky if you try to rush it. Bake these buns until they are golden. Allow them to cool completely and then wrap and use them as needed. Most of mine are stored in the freezer until the next craving overwhelms me!

Aren’t These Beautiful?

Aren’t These Beautiful?

Ingredients:
2 tablespoons yeast
2 tablespoons agave syrup or your choice of sugar for the yeast
1 1/2 cups water at 125*F

1 cup tapioca flour/starch
1 1/2 cups sorghum flour
1/2 cup teff flour
1 tablespoon xanthan gum
2 teaspoons salt

2 tablespoons olive oil
1 teaspoon vinegar
3 egg whites (reconstituted dry egg white works fine)

1/4 cup toasted sesame seeds for topping (they do not toast during baking)

Oil your pan(s), dust with cornmeal (or not) and set aside. The cornmeal gives them a little bit of extra ‘finish’.

Toast your sesame seeds in a small skillet on the stove top or in a glass pie plate in the microwave if you prefer them toasted like I do. Be careful, they go quickly.

Preheat your oven to the lowest setting possible. Then turn off the heat. This should give you a safe warm place for the buns to rise. It keeps the curious at bay (husband, children, cats, etc.)

Whisk your sugar, water and yeast in small bowl. Mix salt, xanthan gum, flours on low in your mixing bowl. Mix the egg whites, oil and vinegar in a medium bowl. When the yeast mixture is foamy, add it to the flour mixture. Then add the egg white mix to the flour and yeast. Turn on the mixer and process the batter on medium speed for four minutes. It will most likely ‘climb’ your mixer beaters so have a spatula handy to push it back down if necessary. Scoop batter, 1/3 cup per bun, and place on or into your pans.

Dip a spatula in water and use it to smooth and shape the tops of your buns. Sprinkle with sesame seeds. Cover and let rise to double in a safe warm place. Remove the buns briefly from the oven until you can raise the oven heat up to 350*F. Return the buns to the oven and bake for about 20- 30 minutes (all ovens bake differently). Keep an eye on them as the time gets close. They should be golden and toasty but not at all dark. Makes approximately 12 buns (these were four inches in diameter).

Split them with a sharp serrated knife and pile on the fillings and spreads of your choice!

Mom

Comments (4)

Red Poppy Coffee Co. – Gluten-Free in Georgetown, TX

   Usually I prefer to eat at home for many reasons mostly because it is difficult to be confidant about eating out. After years and years of chicken salad the prospect of ‘eating out’ long ago lost any charm that it might have had.
   Megan and I planned to spend Friday afternoon together and our objective was to get her started on a crochet project. We had agreed on a one-skein blanket for Rusty, the family yorkie. I picked up Megan at her dormitory and at our first stop we purchased yarn and a crochet hook. We did not want to spend our precious time driving back and forth to the house so we went to the nearby Georgetown library that has amenities such as comfy chairs, work tables in quiet nooks, and a very nice in-house coffee shop, the Red Poppy Coffee Co.
   We arrived at the library well after the lunch hour. I had tucked ‘emergency food’ in my purse, as usual, and was prepared to purchase coffee for myself plus whatever Megan wanted.
   Did that sign on the pastry display case read ‘gluten-free pizza’? I was all over that! Megan and I each ordered an individual Pesto Pita Pizza, mine to be gluten-free and hers to be regular. We found a booth and settled in with the yarn and set to work. A little later our pizzas and drinks were delivered to the table. The gluten-free pizza was square and the regular one was round and otherwise they looked exactly the same. The gluten-free crust was tender, slightly chewy, yeasty, and wonderful. The toppings were excellent quality and very tasty.
   About every two weeks I go to the library to pick up books. How did I ever miss the fact that the Red Poppy Coffee Co. was serving gluten-free?
   In my excitement over the pizza it completely escaped me that there was apple pie and a cupcake also gluten-free as Megan informed me on the way back to her dorm. And their menu advertises gluten-free bread on any sandwich! No big deal, I would have chosen the pizza regardless.
   It’s getting better out there. Micco recently recommended a recipe book entitled Vegan Cupcakes Take Over the World. Let’s make them gluten-free as well!

Mom

Leave a Comment

The Gluten-Free Pantry French Bread & Pizza Mix

   Strangely enough The Gluten-Free Pantry mixes are not in my grocery store gluten-free section although all of them are gluten-free. They are displayed in the International Foods isle, perhaps because they are a product of Canada.
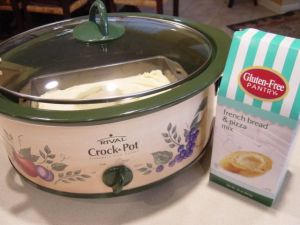
   Whatever the reason I am happy that they are there. We all need a couple of pantry staples that we can pull out and whip up something really good when we don’t have time to do the longer way. And I was motivated by the experimenting of Stephanie O’Dea at A Year of Slow Cooking and her technique for baking bread in a slow cooker. My Crock-Pot and this French Bread & Pizza Mix sat out on the kitchen counter for four days to remind me; and now the mix is mixed and the bread is baked!

The Crock-Pot and the Mix

The Crock-Pot and the Mix

   The first time I made bread from this mix was when I went to help Rita pack and move to Virginia in 2008. This bread was the only gluten-free baked goods that we had at her house. The taste and texture reminded me of the Pepperidge Farm bread that I bought for the kids when they were very small.
   It is difficult enough for a child to be sprouting teeth and learning to chew without their little peanut butter sandwich gumming up and making swallowing difficult. It was the soft white bread and not the peanut butter causing the problem. Slices of the Pepperidge Farm Very Thin White Bread made just the right size sandwich to fit a small mouth and our problem (safety issue) was solved.
   The Gluten-Free Pantry website announces that they are changing the look of the packaging. I hope that includes legibly printed (for all eyes) instructions. At first the dough was not coming together so I went back and re-read to see if it was my mistake. I thought perhaps the two extra large eggs would equal two eggs plus one egg white and so maybe it needed another egg. No, the dough was still thick enough to mortar bricks together. The water amount looked like 1 1/4 cups but by squinting it looked somewhat different. So I pulled out the magnifying glass and read 1 3/4 cups of water. So I dumped in another 1/3 cup of water and then it made bread dough. That tiny print on a mottled gray background could definitely be improved.

Ready to Bake (with Latte for Me)

Ready to Bake (with Latte for Me)

   This mix produces a 2-pound loaf and the directions call for a 9 inch by 5 inch bread pan. My old bread pans are quite definitely 8 inch by 4 inch so there was bread dough left over. The loaf pan went into the 7-qt Crock-Pot slow cooker. The remainder of the dough was divided into a cupcake pan to make small dinner rolls. Rising took quite longer than I thought it should. Patience, patience (not my strongest suite and after all it was a cold day), and eventually there was bread!
   Usually I prefer to make my bread from scratch with dense nutritious flours. This mix is a great shortcut for a treat or for pulling something together when there is no time to fuss over it.

Mom

Comments (1)

Those Gluten-free Flours

   Bob’s Red Mill produces a wide variety of gluten-free flours. My local HEB grocery in Georgetown stocks quite a few of them but occasionally I drive to Round Rock or Austin to pick up the others. This list consists solely what I have on hand. It was a surprise to realize what variety was there after pulling bags out of the back shelf corners, the door shelves, and bins. This made me realize that there is no organization system in there. And that’s not going to happen anytime soon 😉

Gluten free flour list in no particular order:
Almond
Coconut
Hazelnut
Tapioca
White rice
Brown rice
Sorghum
Potato
Amaranth
Teff
Quinoa
Garbanzo

   Amy at Simply Sugar and Gluten-Free  coincidentally happens to be writing about what she has found regarding the various qualities of gluten-free flours and how to use them. So I’m just going to mention the ones that work the best for me and the ones that don’t cooperate so well.
   Coconut is my absolute favorite flour. It has an elusive fragrance that adds to the yummy quality of sweet baked goods. Even if the recipe is based on other flours I sneak in a tablespoon of coconut flour much like you would use vanilla to intensify other flavors as in my Pumpkin-Spice-Raisin Cookies .
   Garbanzo bean flour is another favorite. I started using it with recipes from Erin McKenna’s recipe book, BabyCakes , most especially my version of Cinnamon Toasties.  Erin demonstrated this recipe on Martha Stewart which is where I discovered it. WARNING: You do need to be aware that most of her recipes call for a flour blend that includes fava bean flour. That is a concern for a small segment of the population who can have a serious anemia reaction known as favism. Read about favism here. A friend had that reaction and needed a transfusion to save his life. The source of the fava bean ingestion was never discovered. As a result there will never be any fava bean products in my kitchen.
   Tapioca flour is used a lot in blends to help provide a nicer crust especially if you are working with a recipe with naturally low sugar content or substituting for sugar with non-nutritive sweeteners.
   Potato flour provides a significant amount of iron whereas potato starch does not. The flour is somewhat heavier than the starch but when balanced in a blend it works just fine.
   Sorghum flour has an aroma when baking that almost makes me believe that there is wheat flour in the recipe. It is especially good in breads.
   My favorite sweet baking blend is found in my recipe for Date Cake – Revisited, my gluten free adaptation of Ricki’s Mrs. K’s Date Cake found on her Diet, Dessert, & Dogs blog. And as I noted in that post – first attempts do not always produce wonderful results. My blend works in many other recipes found in Ricki’s book, Sweet Freedom. I have been baking from that book for months now.
   Amaranth and quinoa pack some powerful nutrition having a complete amino acid profile which translates to high quality protein. And while you want to use them for that reason the strong flavors make it difficult to find a suitable recipe match. So far they have not worked for me in breads or sweets. My one real success is amaranth in my savory Lentil Patties. It might be that quinoa would work there also. If you have a recipe that is happy with quinoa flour I would love to try it!
   Hazelnut is a recent purchase but so far I have not tried the recipe for which it is intended. That would be another of Ricki’s fabulous recipes, Hazelnut Melting Moments.
   Teff flour is another recent acquisition and I intend to use it in bread recipes. If you happen to be in a baking mood . . . Stephanie at A Year of Slow Cooking has a book out called Make It Fast, Cook It Slow and it has directions on how to bake bread in a crockpot. Intriguing!
   It’s no wonder my friend Lynn once commented that you need a separate freezer just to store your gluten free flour!

Mom

Comments (4)

Tasty Bite Entrees

   We are all encouraged to eat fresh and eat local but there are many of us who do not have the time to do the shopping, preparation, and cooking. We fill in the gaps with ready-to-eat and drive-through-fast-food all the while wishing we could do better. Rita and I struggle with this all of the time attempting to be gluten-free and feed ourselves and our families well. We employ various strategies and alternate between 100% homemade and furiously reading labels and trying to find the best off-the-shelf products.
   Rita and I were shopping at World Market in Round Rock over the holidays and discovered that they carried the Tasty Bite packaged heat-and-eat entrees. Many of these are naturally gluten-free as well as vegetarian, kosher, no MSG, and preservative free plus they are shelf stable and do not need refrigeration. Rita was familiar with many of these because David often takes them to work for lunch. She helped me pick out a few that she knew he had sampled.
   So far I have tried the Channa Masala and Kashmir Spinach – combinations that were previously unknown to my taste buds. And what I have been missing! Spicy does not mean scorching hot – spicy is lots of herbs and seasoning, ingredients you recognize and can pronounce and might even have in your own pantry! The package is labeled as two servings but the calorie count is so modest you would not be over-indulgent if you ate the whole packet – like I did 😉      The Channa Masala was so good that I did a web search for a recipe so that I might make my own. The only thing is that the chickpeas (garbanzos,channa) in the packet were so much larger than any that I have ever seen that I will probably just continue to keep a few of these Tasty Bite packets in the pantry. And thinking ahead, this can be a new emergency/travel food . . . .

Mom and Rita

Leave a Comment

Van’s All Natural Waffles

   Every now and then when trying a new gluten-free food, sometimes homemade, sometimes commercial, a taste memory comes rushing back. Do you remember toast – that elusive slightly sweet smell and the crunch with tiny, savory little crumbs brushing your tongue as you chew?
   Last year a batch of flat bread that must have been baked a little long did not want to roll. It filled the pan like a very thin pizza crust without toppings. One piece was chewy and tasty but as I was somewhat perplexed at the result the remainder was cut up and frozen. I thought about it for a while and later I put a piece in the toaster to defrost it and experienced toast for the first time in years. And that is what happened with the rest of the batch. Now, if I want my egg on toast when Don is cooking poached eggs then I make up a batch of that recipe.
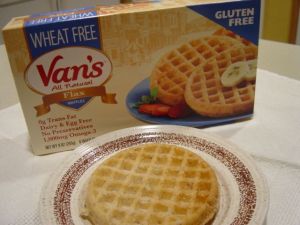
   More gluten-free food is becoming locally available at the mainstream grocery stores and I was at my local HEB looking for a specific brand of bread and/or pizza crust that was supposed to be there and had been highly rated. None of that was to be found but there were several flavors of these Van’s waffles. My waffle taste memories go way back when my Dad used to make a production out of baking waffles on a Sunday morning. In the freezer there were apple and blueberry variations available but I wanted to taste the basic waffle without embellishment so I chose the Van’s All Natural Flax version.
   One of those waffles popped right out of the box and into the toaster even before the rest of the groceries were put away. That toasty aroma filled the air. The stress of shopping always makes me hungry and it took a bit of control not to burn myself trying to take a quick bite. It was crispy on the outside and tender on the inside. So another one went into the toaster but this time I was thinking sandwich. A single paper-thin slice of ham and a small slice of cheese were wedged in between the two sides of the waffle that I had pried apart with the aid of a fork and a sharp serrated knife.

Van's All Natural Gluten Free Waffles

Van's All Natural Gluten Free Waffles

      This is what I call ‘fast food’ out here on The Gluten-Free Edge! For a quick out-the-door breakfast grab one of these waffles and a cup’a whatever starts your day the best.

Mom

Leave a Comment