Archive for Basics

Quinoa – Learning to Love It

    Quinoa (kee-nwa) was an ancient food of the Incas – it was considered sacred and referred to as ‘mother of all grains’. Although no longer widely known or used it is gaining in popularity due to its nutritional qualities and versatility.

    Unlike most other grains and seeds quinoa contains all of the amino acids needed for humans to assimilate as a high-value protein. In addition to being gluten-free and easy to digest it is a good source of dietary fiber, protein, phosphorus, magnesium and iron.

    The quinoa seeds, as harvested, have a somewhat soapy and slightly bitter coating of saponins that discourage birds from consuming the seeds. Most quinoa available at your local grocers has been pre-soaked and rinsed to remove this coating. I always soak and rinse my quinoa whether it is presented in bulk or packaged and labeled as pre-rinsed. This insures that the seeds are clean, tender, and ready to accept the seasonings in your recipes be they sweet or savory.  Evidently a short-lived experiment in raising quinoa without the saponins coating resulted in birds consuming most of the harvest. And so I soak  . . . .

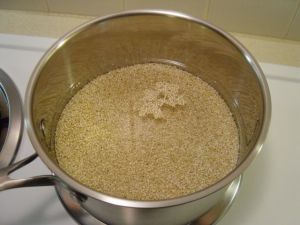
1) Measure out the quinoa and add enough water so that the mixture is slushy when stirred.

Quinoa Seeds Soaking

Quinoa Seeds Soaking

2) Pour the slush into a mesh strainer and thoroughly rinse. If the soaking water is only slightly hazy when stirring then 15-20 minutes is probably enough. These pictures are of bulk quinoa that needed about an hour of soaking and a change of water to clear.

Draining the Soaked Quinoa

Draining the Soaked Quinoa

3) Dump the soaked quinoa into your pan and cover with water. Turn the heat on medium until the mixture starts to bubble. Then turn the heat down low and put on the lid. Watch it very carefully until it settles down to a steady simmer because like oatmeal or pasta it will make fierce bubbles that climb the pot walls and boil over onto the stove.

Turning Up the Heat

Turning Up the Heat

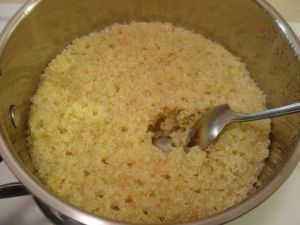
4) The quinoa is done when it looks something like a sand dune on top with minor dips and valleys that are no longer moving. There should be no liquid visible when you take a spoon and check the bottom of the pot.

This Batch Is Fully Cooked

This Batch Is Fully Cooked

    Cooking quinoa is similar to cooking pasta in that you may prefer it very tender or ‘al dente’. You may pre-cook it for a recipe or add it directly to liquids in the recipe. It has the capacity to absorb an amazing amount of flavor from added ingredients. I pre-cook it over low heat for 15-45 minutes; then turn off the heat and let it cool slowly on the burner. The longer it was soaked the shorter the cooking time. Also, if there is still water and it is cooked as long as you like then just drain of the excess water. If you cook it without salt or seasoning then you can use a portion of it in a sweet recipe and the remainder in a savory dish like this one.

    This basic recipe was served at a potluck lunch meeting and received very favorable comments. It was prepared with a large, sweet onion and two fresh tomatoes. I included some ground turkey breast to make it a main dish meal.

    When I make it for Rita, who is currently avoiding nightshade plants I use washed and chopped zucchini in place of the tomatoes. The resulting texture is very similar. I also add a small carrot cut in bits to provide some color,

Savory Quinoa Casserole
Ingredients:
1 cup of dry quinoa cooked with 2 total cups of liquid = 2-2.5 cups cooked quinoa
(If a can of organic diced tomatoes is used for part of the liquid then omit the fresh, sliced tomatoes.)

3 tablespoons olive oil
1 teaspoon ground yellow mustard (French’s yellow mustard works – it is gluten-free)
3 bay leaves
1 teaspoon ground cumin
1 large onion, chopped
1/2 teaspoon ground ginger
2 small tomatoes, thinly sliced (optional, see above, or zucchini))
1/4 teaspoon turmeric
1 teaspoon sea salt
2 tablespoons fresh cilantro

Directions:
    Heat the oil on medium or medium high  in a large skillet that has a lid.  Add your mustard and bay leaf to the oil and let it sizzle. Stir while adding your cumin and wait a few seconds before adding the onion.
    Sauté the onion until it starts to soften and turn brown. Add ginger, tomatoes (or zucchini/carrot), and turmeric. Let soften and then add your quinoa, stirring it in gently and sprinkling with salt. Reduce heat and cover, cooking for 8-10 minutes. Remove from heat, stir once, sprinkle with cilantro, cover, and let sit for 5 minutes. Fluff and serve.
    If you add meat, tofu, or beans then include it already prepared along with the quinoa. This is a good recipe to extend leftovers from another meal. And any local vegetables in season are excellent options.

Gretchen (Mom) and Rita

Comments (1)

Nut ‘Cheese’ Experiment, Lesson Learned

   Veganism has been on my mind for some time as partly an environmental issue and partly a health issue. It sort of loops in fits of start, stop, long pause and then start again. Meanwhile the recipe collection has been gathering more and more vegan entries.

   Reading recipes has been a past time ever since I could read. Even in elementary school I had shoe boxes crammed with recipes on a shelf in my closet. I still have some of those recipes (in nicer boxes) plus an ever expanding file on the PC hard drive; same fetish, different media.

   Thanks to being indoors recently due to weather and allergies some of the ones that are more intriguing and time consuming have made it to the kitchen. As a cheese lover the concept of nut ‘cheese’ made me wonder if that was even possible, how close was it to that flavor I so loved, and could it happen in my own kitchen?

   The process started several days ago with the purchase of raw almonds. Three days ago they went into a pan of water to soak so as to be able to remove the fibrous skin. The next day they were drained and skin removal began. It took at least an hour, likely more, and there were blisters forming on my thumbs – this was from about 1.5 cups of dry almonds. After all of the creamy white blanched almonds were done I put them in the fridge while I contemplated my sore thumbs.

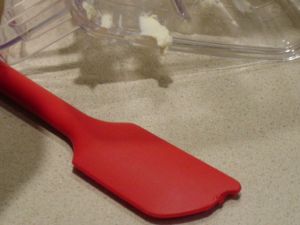
   Finally, two days later, with thumbs on the mend, I made notes from several recipes, gathered ingredients and assembled the blender. (Note to self – really, really have to look into purchasing a high powered blender) It was a wrestling match, pushing down the mixture, resting the motor, keeping it from ‘walking’ on the higher speeds, and adding water after much agonizing over initial proportions. The basil was nicely distributed but when did I add pimiento? Rats! I had chipped up my favorite silicone spatula.

Ooops!

Ooops!

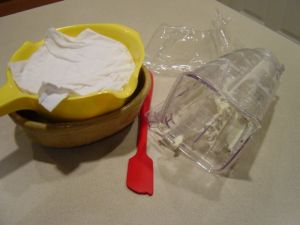
   Finally the mixture achieved an acceptable level of smooth. Between several layers of clean fabric, packed all into a strainer, it was set aside to drain (with silicone chips removed).

   Two hours later – no ‘draining’ observed . . . . Will this even be edible? Three hours later – the fabric is damp. It is probably time to put it in the fridge to mellow? Ripen? At least it smells fresh so hopefully this wasn’t a big waste of time.

So far . . .

So far . . .

   There are whole, natural raw almonds left in the bag. Most resources on the internet describe a very short time in hot water being the key to popping almonds right out of their skin. If (if) I try again, I will opt for this method over the long cold soak.

In the meantime I’m consoling myself with something sweet and more antihistamine chased with an almond milk chai latte.

Mom

Comments (2)

Southern Homestyle Corn Flake Crumbs

   Homestyle corn flake crumbs? Did you ever make them ‘home-style’? Pour corn flakes into a baggie and run the rolling pin over them which gave you multi-sized, crushed flakes ranging from large crumbs to powder?
   These gluten-free flakes from The SoyNut Butter Company are nicely uniform. I have used them occasionally as a substitute in cookies and crumb toppings when the pantry turned out to be bare of rolled oats that were gluten-free.

Southern Homestyle Corn Flake Crumbs

Southern Homestyle Corn Flake Crumbs

   Andrea and I were discussing crumb coatings one afternoon while at the fitness center and she shared with me her coating recipe for all manner of applications. This works for cutlets or patties of any type: chicken, pork, fish, bean patties, tofu, or whatever you have in mind. It bakes up nicely or sautés in a skillet. Andrea’s original recipe called for cracker crumbs but this works very well. We had it on baked tilapia one evening and it is savory and crunchy – a wonderful touch.

Andrea’s Oven Bake Recipe
1 pound of cutlets
1/4 cup gluten-free corn flake crumbs crumbs
1/4 cup grated Parmesan cheese
1/2 teaspoon dried basil, crushed
1/2 teaspoon garlic powder
1/8 teaspoon pepper
2 tablespoons olive oil

Mix all of these ingredients together with a fork. Dip or roll your cutlets/patties to coat. Place on a baking sheet and bake at 400*F – 425*F or sauté in a skillet on the stove top.

   This product is available in Texas from H-E-B which carries most of the gluten-free items in my pantry. They can also be ordered online direct from The SoyNut Butter Company or through Amazon.
Mom

Comments (1)

Basic White Sauce

   Before the days of commercial-cream-of-whatever soup cooks made their own white sauces for gravy, soups, and creamy dishes. Chefs in upscale restaurants and on television cooking shows still make their sauces from scratch. And cooks at home in their gluten-free kitchens are learning the same technique. It is a simple process and it tastes better than the canned stuff.

    I recently baked up Scalloped Leeks and Potatoes using this sauce plus a bunch of leeks and about 1 1/2 pounds of small red potatoes. The potatoes were very lightly parboiled, cooled and sliced. The leeks were washed, sliced, seasoned, and sautéed. They were layered leeks, potatoes, leeks, potatoes, leeks, and topped with sauce in a 9 inch square oven proof dish and then baked for an hour at 350*F or until the potatoes were very tender. The dish should be allowed to cool somewhat (10-15 minutes) before serving. During the cooling process the potatoes will reabsorb some of the cooking liquid and be even creamier.

About the ingredients:
   Rice flour is the most neutral flour in taste and has no gooey or gluey surprises when combined with any of your other possible choices of fat or liquid.
   Real dairy butter and milk are the ultimate rich tasting options for the fat and liquid. But quality vegan margarine (or even liquid vegetable oil) and your favorite non-dairy milk can produce an excellent creamy result.
   Seasoning is the key for winning the taste-test sweepstakes. Just the right amount of salt and pepper plus some pleasing combinations from the herb section of your pantry will complete the sauce.

Ingredients:
4 Tbsp. white rice flour
4 Tbsp. Earth Balance margarine
2 cups almond milk
1/4 – 1/2 tsp. onion powder
Sea salt & ground pepper
Pinch of ground savory (really, just a pinch!)

   Place the rice flour and margarine in a medium skillet. Set on the stove over medium heat. Stir gently while the margarine melts and absorbs the flour. Add about 2/3 of the liquid and keep stirring. While the mixture is heating add the seasonings. Add the remainder of the milk and bring the sauce to an easy simmer. When the sauce is thick remove it from the heat and adjust the seasonings to your taste.

Mom

Comments (1)