Archive for October, 2009

Pear-Plum-Date Catsup

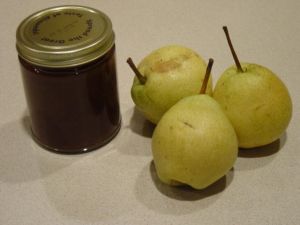
   The Central Texas fall Keiffer pear crop has been almost overwhelming. These are hard, crispy pears with a subtle sweet flavor that need to be ripened properly for happy results. Otherwise you might try them too soon and think that they are only fit for chunking at the squirrels. Full details on growing and handling these pears can be found online at Keys to the Keiffer Pear .

   The usual advice is to keep them in a cool place, 60*F – 65*F, for two to three weeks, even longer if you store them in the fridge. They will slowly soften and sweeten so that when you have nearly forgotten about them you suddenly have a great deal of ripe fruit on hand. They will still be crispy, like apples, but no longer tasteless and hard as rocks.

   Rita had told me some time ago about a young woman with an allergy to the nightshade family of plants which includes all peppers (sweet or hot), potatoes, and tomatoes. News about this kind of allergy had started a thought process around catsup; and if you can make catsup then barbeque sauce cannot be far behind. The internet turned up several recipes for plum catsup and there are even commercial brands available. But with all of these pears on hand and my bent for simplifying and using locally available wherever possible this Pear-Plum-Date Catsup is what evolved.

   Also these steps can be done entirely separate; by a couple of days if need be. So if you are busy, tired, interrupted, whatever, you can still make this catsup.

Pear-Plum-Date Catsup - really?

Pear-Plum-Date Catsup - really?

4-6 pears, at least somewhat ripe
6 dried plums (we used to call them prunes)
6 dates (Medjool was in the pantry)
1/4 cup evaporated cane juice

   1. Wash the pears and rinse well. Cut out all bits of the gritty core but do not peel. Cut them into small pieces that your blender can handle easily. You should have a heaping two cups of chopped pears. Cut up the dried plums to be sure there are no residual pit pieces. Remove the seeds from the dates. Put all of the fruit into a one-quart saucepan and add about a tablespoon of water. Pour the evaporated cane juice in and stir a bit. The sugar at this stage is to help the pears release their juices. The cooking is done over very low heat for 30-60 minutes (this depends on your pears and patience). Set the timer every 15 minutes to stir and check several times during this part of the process. You don’t have to hover, just be sure you can hear the timer. Turn off the heat when the pears are fork tender and go do something else – knit, work out, fix dinner, take a nap.

   2. Put the cooled, cooked fruit through the blender. The fruit is tender but the mixture is thick so the sides need scraping down to get all of the bits incorporated. At this point I poured the pureed fruit back in the pan and put it in the fridge to finish up the next day.

   3. Put the pan back on the stove. Add the following ingredients, heat and stir:

1/4 cup evaporated cane juice
1/2 cup apple cider vinegar
1 teaspoon sea salt
1 teaspoon ground allspice

The mixture should be thick enough to mound in your spoon but slide easily back into the pot. If it is not thick enough then simmer on low heat until it is the consistency that you prefer. The hot mixture will spatter your stove at this point so you may want to tilt a lid on the pot.

   4. Spoon your catsup into clean jars with good screw-on lids. This recipe makes about 2 cups with a little extra for testing on a burger.

   Other internet recipes suggested cloves, ginger, cinnamon, and pepper in various combinations. After I added the vinegar and allspice I tasted a tiny bit on a spoon. It reminded me so much of my former favorite Hunt’s Ketchup* that I stopped right there. Follow your taste buds to create your own favorite combination!

Mom

*There is inconclusive information available regarding gluten in this product. Some references say it is gluten-free and others say it is only wheat-free thus ignoring other gluten contaminates. The Hunt’s website says nothing which in itself says a lot. Also, a major ingredient is high fructose corn syrup – homemade catsup sounds better all the time!
Comments (2)

Lentil Patties

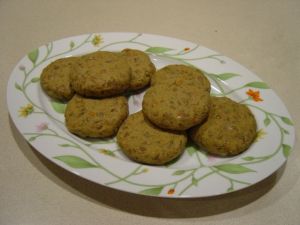
   The Lentil Rissoles that Ricki featured on Diet, Dessert, & Dogs reminded me of how much I love the combination of lentils and carrots. Lentils were in the pantry, carrots in the fridge, good to go? Um, well not so much I discovered when those lentils were already simmering on the stove. No fresh onions in the house, peas don’t agree with me (even if they are adorable peeking out from a rissole), no gluten-free bread for breadcrumbs – this was going way off track. By then inspiration had cooled and ground walnuts turned into Bob’s Red Mill almond meal from the freezer. As if for the coup-de-grace bread crumbs morphed into basic flour but surprise! The amaranth flour finally found a really excellent and tasty application. Sometimes accidents turn into ‘keepers’ and I’ve repeated this recipe several times now just to be sure. These freeze well, reheat in the microwave, and make a quick, substantial and nutritious breakfast, lunch, or snack. For breakfast these go really well with Rita’s Cranberry Drink.

Ingredients:
1 cup lentils, picked over and washed
2 cups broth or bouillon
2 Tbsp onion flakes
1 tsp garlic powder
2 tsp ground cumin
1 tsp ground coriander

1 medium carrot, finely diced or shredded
1/2 – 1 cup finely diced celery or other veggie

2/3 cup almond meal
1/2 cup amaranth flour or chickpea flour

1 Tbsp olive oil

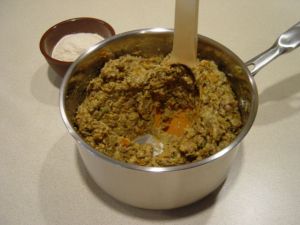
Put the lentils in a saucepan, add the broth, and place over medium heat on the stove. Add the onion, garlic, cumin and coriander. Slowly bring to the boil, add the carrots and celery, reduce the heat to low and simmer, covered, for about 45 minutes, or until the lentils are thoroughly cooked and pulpy, stirring frequently to stop them from sticking and/or scorching. Remove the lid during the last 10 minutes to evaporate any remaining liquid. The mixture should be fairly mushy and there should be no liquid visible on the bottom of the pot.

Fully Cooked, In the Pan

Fully Cooked, In the Pan

Allow the mixture to cool. Stir in the almond meal and flour. Form into eight 3-1/2” round patties. Cover and refrigerate until they are firm.

Ready to Freeze or Brown in Olive Oil

Ready to Freeze or Brown in Olive Oil

Heat a bit of olive oil in a skillet over medium heat. Cook the patties about 5-6 minutes on each side, until the outsides are browned and crispy and they are heated through. If they are frozen I heat them in the microwave for one minute before sliding them into the skillet with the olive oil. This recipe makes 8 patties that may be frozen before or after browning.

Mom

Comments (5)

Basic White Sauce

   Before the days of commercial-cream-of-whatever soup cooks made their own white sauces for gravy, soups, and creamy dishes. Chefs in upscale restaurants and on television cooking shows still make their sauces from scratch. And cooks at home in their gluten-free kitchens are learning the same technique. It is a simple process and it tastes better than the canned stuff.

    I recently baked up Scalloped Leeks and Potatoes using this sauce plus a bunch of leeks and about 1 1/2 pounds of small red potatoes. The potatoes were very lightly parboiled, cooled and sliced. The leeks were washed, sliced, seasoned, and sautéed. They were layered leeks, potatoes, leeks, potatoes, leeks, and topped with sauce in a 9 inch square oven proof dish and then baked for an hour at 350*F or until the potatoes were very tender. The dish should be allowed to cool somewhat (10-15 minutes) before serving. During the cooling process the potatoes will reabsorb some of the cooking liquid and be even creamier.

About the ingredients:
   Rice flour is the most neutral flour in taste and has no gooey or gluey surprises when combined with any of your other possible choices of fat or liquid.
   Real dairy butter and milk are the ultimate rich tasting options for the fat and liquid. But quality vegan margarine (or even liquid vegetable oil) and your favorite non-dairy milk can produce an excellent creamy result.
   Seasoning is the key for winning the taste-test sweepstakes. Just the right amount of salt and pepper plus some pleasing combinations from the herb section of your pantry will complete the sauce.

Ingredients:
4 Tbsp. white rice flour
4 Tbsp. Earth Balance margarine
2 cups almond milk
1/4 – 1/2 tsp. onion powder
Sea salt & ground pepper
Pinch of ground savory (really, just a pinch!)

   Place the rice flour and margarine in a medium skillet. Set on the stove over medium heat. Stir gently while the margarine melts and absorbs the flour. Add about 2/3 of the liquid and keep stirring. While the mixture is heating add the seasonings. Add the remainder of the milk and bring the sauce to an easy simmer. When the sauce is thick remove it from the heat and adjust the seasonings to your taste.

Mom

Comments (1)

Mexican Eggplant

   I brought this casserole to last month’s volunteer potluck luncheon meeting. It is a recipe clipped from a grocery store magazine sometime in the late ‘70s. It features nutritious seasonal ingredients and is easy to put together.
   We had a pound of lean pork sausage in the freezer that I used for the ground meat. My green pepper was very large and probably equivalent to a full cup. I also added a cup of finely chopped celery (love that stuff). Sometimes I substitute a drained can of kidney beans for a vegan version. Add a teaspoon of chili powder for a spicier dish when not using sausage.

Ingredients:
1 1-lb. eggplant, diced, peeled if you prefer
1 lb. ground meat or a drained can of beans
1/2 cup chopped onion
1/2 cup chopped green pepper
1 tsp. salt
1/4 tsp. garlic powder
1/4 tsp. oregano
1/4 tsp. marjoram
1 16-oz. can stewed or diced tomatoes

Sauté the meat and vegetables in a large saucepan or skillet (a wide skillet is better for cooking these watery vegetables). If not using meat then sauté the vegetables before adding the beans. Add the seasonings. Simmer until the juices are totally reduced to the bottom of the pan. Add the tomatoes and simmer over low heat until the green peppers are thoroughly cooked.

Serve alone as a low-carb stew or over rice or your favorite gluten-free pasta.

Mom

Comments (2)

Betty Crocker Mixes and Pumpkin Cupcakes

    Clara and Jenna surprised me with a cupcake. It was a pumpkin cupcake made from one of the Betty Crocker gluten-free mixes and based on a recipe that they had found in the October issue of Real Simple magazine.

   I spend so much time baking from scratch that it had never crossed my mind to try a commercial mix. The cupcake was so good (you really would think it was a cupcake-from-the-past) that I decided to take a baking detour for the upcoming November birthday and create a gluten-free birthday cake using their recipe adaptations. The mix itself consists of white sugar and white starch carbohydrates and calls for a stick of butter and three eggs, something you definitely reserve for rare occasions at my age, however the memory of that cupcake keeps calling my name.

Ingredients:
1 15-oz. box Betty Crocker gluten-free yellow cake mix (plus the butter, eggs, and vanilla called for in the package directions)
¼ to ½ tsp. pumpkin pie spice
1 15-oz. can pumpkin puree

Instructions:
   Heat oven to 350 (325 convection). Spray your cake pans or line muffin tins with paper liners. Clara and Jenna used 16 silicone muffin cups on a baking sheet; no cooking spray needed.

    Prepare the cake mix as directed, but with the following change: Add the pumpkin pie spice and substitute 1 ½ cups of pumpkin puree for the water called for in the package directions.

   Fill the pan/muffin cups with the batter. Bake until a toothpick inserted into the center of the cake/cupcake comes out clean, 18 to 22 minutes.

    Freeze the cupcakes without the frosting. To enjoy, thaw cupcake and frost with cream cheese frosting.

   Clara and Jenna used Betty Crocker cream cheese frosting.

   Real Simple Magazine suggests making your own cream cheese frosting:
2 8-oz. bars cream cheese, at room temperature
2 c. confectioners’ sugar
   Using an electric mixer, beat the cream cheese and sugar until creamy. Spread on the cupcakes and top each with a piece of candy corn.

Mom

Leave a Comment

Classico Sauces

    Classico has a line of sauces that are excellent. All of their red sauces and white sauces are gluten-free. Their website lists ingredients for each and every item in their line. If you have other allergies or sensitivities be sure to read up on your product of interest. It is easier on the eyes and saves time to read the labels online instead of standing in the isle at the grocery store!

    I like to start some of my specialty dishes with one of their sauces. My favorite has to be their basic Creamy Alfredo sauce. It does include soybean oil so will not work for those also sensitive to soybean. It is not hard to melt a stick of butter, add a cup of cream plus salt&pepper and 4-6 ounces of freshly grated Parmesan but you just have to close your eyes and not think about calories or cholesterol. You wonder how Classico Alfredo-sauce-in-a-jar can be so modest in calories and taste so much richer than it is.

    In mid-winter when cabbage is plentiful I will pour a jar of Creamy Alfredo over a head of cabbage that has been chopped, boiled, and drained. You can top it with a bit of grated Parmesan and pop it in the oven but it really doesn’t need embellishment.
   
    There is usually a jar of  Tomato and Basil tucked away in the cupboard waiting to go into one of my chicken, sausage, and pasta casseroles or a Crockpot of spicy meatballs.

    The Classico pesto sauces are easy and packed with flavor. A wonderful pizza variation (or for those who cannot eat tomato) the Basil Pesto sauce spread very thin over a crust before adding your toppings is very flavorful and delicious. It does contain soybean oil so, again, read the labels before making your selection.

Mom

Comments (2)

Cranberry Juice Drink and Oatbran Banana Muffins

    Rita recently sent me the proportions for a juice drink that she has been using on her ‘love your liver’ diet. It is simple, tart, and tangy and each ingredient is something that I already have on hand but had never used in this combination.

Cranberry Drink:
1/4 cup 100% pure cranberry juice (no sugar)
1 tablespoon lemon juice, preferably fresh
1 teaspoon apple cider vinegar
8 ounces of water

Rita's Cranberry Drink

Rita's Cranberry Drink

    Baking efforts over the summer left me wondering if I would ever have a successful bread or muffin incorporating bananas. I was nearly resigned to using dry banana muffins mashed up with fresh fruit for a breakfast pseudo-cereal. Then along came Sweet Freedom. These recipes are going over to the gluten-free side so easily that I have enlisted family and friends to enjoy them with me – and they don’t seem to mind!
    The Oatbran Banana Muffins with almond butter are breakfast heaven. The only adjustment that I made to Ricki’s original recipe is to replace the 1 3/4 cups of spelt flour with a like amount of flour blend that I favor in most sweet recipes.
My GF Flour Blend:
1/3 cup tapioca flour
1/3 cup brown rice flour
1/3 cup coconut flour
3/4 cup sorghum flout
1 teaspoon xanthan

Oatbran Banana Muffins

Oatbran Banana Muffins

Mom

Comments (3)