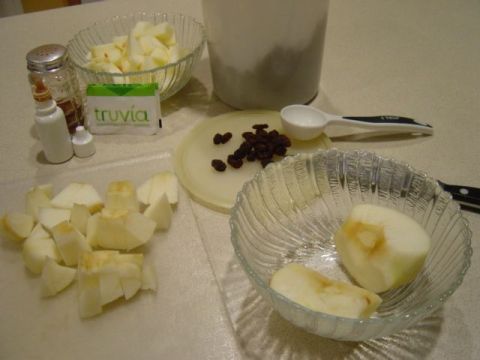
The SOS Kitchen Challenge ingredient for September is apples. There are so many varieties of apples in the market right now. Choose your favorite or one of the weekly specials. Usually I go for Golden Delicious but the Pink Lady variety is relatively new and entirely wonderful. Ricki at Diet, Dessert and Dogs and Kim at Affairs of Living. Be sure to check out the SOS Kitchen Challenge for September site for lots of other healthy recipe submissions by other bloggers.
This is a naturally gluten-free treat that Don and I have enjoyed over the years. It began as apple pie with crust, canned pie-sliced apples, and lots of sugar, raisins, and cinnamon. The recipe morphed into baked apples after we received a set of individual ceramic baking dishes and decided that as a regular dessert it was better not to have all of that crust.
After a while those convenient water-packed pie–sliced apples were no longer available so we alternated between baked apples from scratch or baked apples from pie filling enhanced with raisins and more cinnamon. The high-fructose-corn-syrup in pie filing always tasted like glue to me so I only ate baked apples when we used fresh apples.
We began to experiment with the current recipe about ten years ago – while we were still living in the country. It was there that we settled on this mix of fresh, partially peeled apples, no-cal sweetener (I really was sneaky about the switchover), plenty of cinnamon, good vanilla to enhance the fruit flavor, and raisins. I always liked raisins. But no one I’ve ever known likes them as much as Don. His motto is ‘too many raisins is not enough’ – there is a song that goes something like that but it is not really about raisins.
When we started using the microwave to cook in we switched from the ceramic bowls to inexpensive microwave-safe glass bowls so we prepare, bake, and serve all in the same easy-clean dishes.
Individual Baked Apple Desserts
1 apple per serving
1-2 tablespoons seedless raisins per serving
1 packet Truvia per serving (this is equivalent of 2 teaspoons of sugar)
Cinnamon to taste
About 6 drops of vanilla per serving
Start with freshly washed and dried apples. Quarter, seed, and peel or not peel to your preference. I like a little more peeling and Don likes less. Cut each quarter into small bites and place a cut up apple in each microwavable serving dish.
Add the raisins – here Don likes more and I like less. Then sprinkle the Truvia crystals over the fruit. Shake some cinnamon on top of the crystals and add the drops of vanilla. Stir to distribute then raisins and seasoning. Add some more cinnamon – almost always.
Place the desserts in the microwave and set the timer for two minutes. Stir and cook for another minute. The apples will have started releasing juice and getting tender. The cinnamon, sweetener, vanilla, and apple juice are blending into a delectable coating for the apples and raisins. Microwave the mixture for one more minute. Remove the desserts to a rack and cover until somewhat cool. Right out of the microwave it will burn your tongue and that is not fun.
This dessert is really good plain. The tart bites of apple with the sweet bits of raisin do not need embellishment. Top with a handful of chopped walnuts and you have breakfast.
A tiny bit of fresh sweet cream, whipped cream, ice cream, full fat coconut milk, or a non-dairy frozen dessert makes an acceptable topping. One of those frozen-synthetic-low-fat-imitation-whipped-toppings is an insult to a good apple but if that is what rocks the boat for someone you love then you keep a tub of it in the freezer for them.
Apples are in season and it is time to enjoy them!
Gretchen (Mom)


